Thursday 22 November 2012

Christmas in Kraft and Black!

 
So Class 2 was held last night so I can reveal the sneek peek card......


You can see the depth of texture that the textured Holiday Frame impressions folder has.  This folder does have a right and wrong way up, there's a small fir tree near the bottom and a baubble at the top.  There's also cute little reindeer (right at the bottom, can you see his head and antlers?) and tiny snowflakes amongst the swirls, which could be cut out.
 
So here's how we made it:
  1. We made an A6 card from a piece of crumb cake (kraft) card folded in half.
  2. We embossed a piece of black card with the impressions folder in a big shot and then cut away the non-embossed card around the oval and glued with wet glue to the front of the card. The centre of the oval does not emboss, it's perfectly placed to add stamped images or sentiments or pre-printed toppers if you don't stamp.
  3. We then stamped the oval and the Noel baubble from Joyous Celebrations (Stampin' Up! again) which co-ordinates with the embossing folder, in black onto kraft.
  4. We punched out the oval with the SU large oval punch and then cut out by hand the shape of the baubble leaving a narrow kraft boarder, mounting both on foam pads. 
Et voila...an easy yet sophisticated card suitable for anyone in the family...could keep the children entertained looking for the reindeer, tree, baubble and counting the snowflakes....well...for all of 5 minutes....

Wednesday 7 November 2012

November Class Sneek Peek


Kraft and black for Christmas? 
 
Oh yes!
 
A sneek peek of another simple card using stamping and embossing and die cutting, from Stampin' Up! Why not come back to see how we get on at 21st November's Class on .  Hopefully I'll remember the coffee this time!

Thursday 1 November 2012

Thanks for Tea


So the final card from the October Class, using a template and colour combination challenge from Clean and Simple.  I love their card templates, they can be scaled up for scrapbook pages too!

This A6 thank you card uses the technique Stampin' Up! call popping pastels, stamp with Versamark then dab with blocked pastels matching the colours of your card (esspresso brown, sage green, grey blue and light bright green).  The scallped border punched strip of card has holes pierced in each scallop.

This uses the litte tea cups from Tea Shoppe stamp set from Stampin' Up! (SU) cut into 2.5cm squares after stamping, which fits prefectly in their scallop square punch...they have a punch that size too, shame we had to cut by hand...well have paper trimmer will travel...

The sentiment is from the retired Say It With Scallops SU set.

Monday 29 October 2012

Sweet Treats no trick


Ok, so I'm not the best painter, of small objects with a large brush, in the world...I prefer 'cutting in' around the skirtings when decorating rather than the whole roller thing...

So what do you think of these cheeky chaps?  I made them from salt dough, my first attempt...I should have used plain flour...but it does give an interesting rounded character to them...LOL...

So how did I make them? The marvels of Stampin' Up! again, I picked these biscuit stamps up in Canada, they're now available here!  The stamps are food safe silicon 6.5cm (2.5 inches) across and fit onto a chunky handle which any nursery aged child or older would love to make (the handle would be a bit large for the tiniest of children).

 
So how did I do it? 
  1. Using your favorite salt dough or biscuit  recipie roll out to about 1cm thickness.  Use a biscuit cutter to cut out, (mine had a serated edge) but do not move the biscuits, remove the waste instead (reuse it and roll out more).
  2. Insert the wooden base of the stamp handle in to the silicon Sweet Pressed Cookie Stamp and gently press in to the biscuits. 
  3. Place the stamped biscuits on to a baking tray and bake according to your recipe (low and slow for salt dough). 
  4. Remove from the oven and cool, decorate with acrylic paint and varnish the faux biscuits, or you could ice real biscuits or leave plain as the pattern is indented.   
  5. For the faux biscuits: punch out circles or scalloped circles and a piece of gold cord.  Make a loop on the back of the biscuit.  Cover the circle of card with a very strong glue such as glossy acents or crystal effects and cover the end of the looop.  Once dry use to decorate the house for halloween.
The stamp set comes boxed, and includes two recipies for edible biscuits, one with and one without eggs.  I think I will be making some real buiscuits for halloween for the office.


Friday 26 October 2012

St Martins Farmer's Market

Tomorrow I'm going to be at St Martins Farmer's Market selling cards and Christmas cards and hopefully some Beatrix Potter baby vests.

The baby vests are an experiment...I have used some fabric transfer paper for the first time.  The printing and the transfer of the image have gone really well.    I know parents and carers are busy people so its got to be able to go through the washer and tumble if I'm going to sell them....I've just popped the vest in the wash at 40 degrees and then I'm going to tumble dry it to see what happens to the design...a melted mess or a gorgeous design...

...why not come and find out for yourself at the Farmer's Market tomorrow, you can come and see my range of cards, plus you can pick up your groceries - bonus. 

The Market is at the Parish Hall, with easy parking outside or at the Community Centre and is open 9am to 12.15.

Thursday 25 October 2012

Thanks for Caring


Our second card in the October Class of 'A Year in Cards' was a sympathy card.  I like to keep these cards simple and allow the sentiment and your own hand written thoughts to be the main emphasis of the card.

Here are two versions of the A6 black and white card using three stamps from the retired Thanks for Caring stamp set from Stampin' Up! (SU) (the orchid was so easy to line up with the sentiment because the cling rubber stamps are shaped and you can see through the acrylic block exactly where you're going, stamp the sentiment first.

We die cut out the sentiment with SU framelets 'Labels Collection', second from smallest one and another from black using the third from smallest one.  I guess other shaped dies would work just as well, but I recommend that you keep it simple.

Next we pieced holes around the black frame with a paper pirecer (or pokey tool) and the Festive Paper-piercing Pack from SU, it actually has the holes all mapped out for these dies!  It also has maps for the Holiday Ornament Dies (which I'll definately be using for my Christmas card classes) and the window frames collection dies.

Glue the black frame to the card and mount the sentiment on foam pads over the black frame.

You can stamp a sentiment in the middle.  Simple as I say.


Monday 22 October 2012

Stamping Stars


Well, my ladies are stamping stars! there were some first time stampers and some experienced ones too!  I took several types of tea but forgot to take the coffee, thank goodness I was able to borrow some from Sheila at Rex Sationners!  Thanks Sheila!

This is the first card we did, we're starting simple and elegant and over the weeks we'll be building skills and experience, we used both wood and cling mount sets. 

I just love the combination of kraft card (crumb cake from Stampin' Up! (SU)) and black, this is what we did: 
  1. We punched a star (SU retired) from crumb cake card and ran it through a dotty embossing folder, via the big shot. 
  2. Next we stamped 'Good luck' (from the former sale-a-bration set So Happy For You) in black on crumb cake and then punched it out with SU's modern label punch. 
  3. Next we used a fine tipped pen and created dashes around the edge of the punched out shapes, a form of faux stitching
  4. Then we cut and folded an A5 piece of black card in half to form a portrait A6 card. 
  5. Next we cut an 8cm x 8cm piece of crumb cake and stamped the dotty outline star from the retired SU Seeing Stars stamp set and glued it on the inside of the card with the star at the bottom right.
  6. We mounted the star and good luck sentiment on foam pads on the front of the card with the top of the star about 2cm from the top of the card, and the sentiment about a centimetre down from the star.
  7. You could also stamp a star on either the front bottom right of the C6 envelope or on the back on the flap.
I think this card could also be adapted as a 'you're a star' card, you could always write a sentiment on a punched out shape to suit your occassion.

Well two more cards to show you, and a sneek peek of one of the cards from the November class; I'll post them over the next week or so, please come back to view.

Sunday 21 October 2012

More Weddings

 
Posted by Picasa
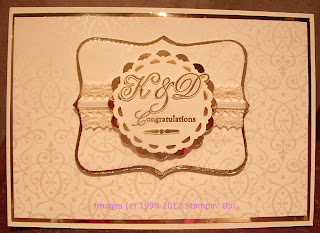
Here's another commissioned card, gold mirri card and gold embossing with a bit of lace and a die cut or two do the trick

Tuesday 16 October 2012

Card Class Tomorrow!

I'm so excited about meeting my class tomorrow at 7pm, all places are now booked, I'm looking forward to getting to know my ladies!  I've just got some final prep to do and my bags to pack, I hope I don't forget anything!

If you've booked your place don't forget to bring your tool kit and the class cost of £66 plus £2.12 materials for this months class.  We'll be looking at good luck, thanks and sympathy, we may even start on our christmas cards too, using simple layouts and building skills and knowledge - and my brand new stamps and dies for the latter too....

I'll post the cards we create after the class, for those of you who can't come and would like some inspiration...please come back and view...

Friday 12 October 2012

Another wedding


Posted by Picasa

This time a simple embossed rose design with a hint of baja breeze card and the bride's and groom's name printed on to white organza ribbon...all from Stampin' Up!  The retired stamp set too....Did I tell you I love their stuff!

Monday 8 October 2012

A4 Wedding Card

 
Posted by Picasa
Don't you just love the versatility of stamps?  Here I turned an image and a sentiment from the Marry Me retired set from Stampin' Up! into an A4 card, create an embossed background and layer it up, add some interest with a large edge punch from Martha Stewart, add some vintage lace and ribbon and a few pearls and swirls.

The vintage lace and perfect plum colour card reflected the colour of Sophie the bride's dress and colour theme.

Thursday 4 October 2012

Banners a go go

 
Posted by Picasa
Another special birthday card, this time for Angelique, she loves the 1940s and 1950s.  We had a themed garden tea party to celebrate so I thought this was a great card. 

Lovely products from Stampin' Up!, all now unfortunately retired, but fortunately now replaced with loads and loads of new products...there are something like 14 new sets of patterened papers...it's a shame I'm going through a clear out, of the whole house, otherwise some of their new lovely papers would be lining my shelves...Free papers...if you join up in the UK to Stampin' Up!
 

Saturday 29 September 2012

A Special 30th Card


Posted by Picasa

A card for my wonderful friend Josie who turned 30 a couple of months back.

Papers, 30 and happy birthday stamps and butterfly die from Stampin' Up!, square patterned die from Sizzix and a free stamp from a magazine.
 

Tuesday 25 September 2012

Card Classes in Guernsey from 17 October

So the classes with the WEA were cancelled, but thanks to the good nature of Sheila at Rex Stationners, a class participant and my other lovely ladies we're going to be running the Year in Cards Class from 17th October at Rex, woo hoo!

So the cost is the same just £66 for 16 hours of teaching over the 8 evening lessons plus the cost of materials (under £5 per class).  We've missed the first date in September, so we'll be discussing whether we have a December class to make up for it or we choose an alternative date.

We'll be using a lot of different techniques, and using many of my favourite products and tools, which I'll share with you.  Starting with a male good luck card using Stampin' Up!, Big Shot, Provocraft products.

I'm looking forward to seeing Sheila and Susan and to meeting Sally, Rachel and Linda for the first time, I'd love to meet you to.  Want to join me for the whole course? Why not Email me and I'll send you more details.

Sunday 16 September 2012

WEA Class Cancelled

Hi All,

Just to let you know that unfortunately the WEA Course 'A Year in Cards' has been cancelled, as htere weren't enough student who signed up to cover the costs of room hire etc.  I will look at other options of running the class, including virtual options or producing card instructions.

Hope to see you all back here soon with some new designs for you soon.

Wednesday 15 August 2012

Saturday 4 August 2012

New to Papercraft?

I've just seen this starter kit of tools from Create and Craft, which is really good value at £12.99 or £8.99 if you're one of their club members.  Great if you're just starting out as it's got something of everything, just add a pencil and eraser and maybe some alcohol free baby wipes (great for getting glue and ink of fingers and tools).  There's no mat which will protect your work surfaces, but a wad of newspaper under the item you're cutting with the craft knife works well, if a little more slowly. 
I have the little scissors, they're very sharp.  The tape pens (blue) are great too, particularly if you're just starting out;  I've just brought a pack of 12 for my A Year in Cards class, which starts in September.

Friday 3 August 2012

Going for Gold

Here's a little card I designed as I got excited about the Olympics coming to London!


A really easy one, punch or cut out 5 rings in olympic colours, snip  through one side each of the gold and green and thread through.  Stamp with your choince of sentiment, this one's from Stampin' Up!, Something to Celebrate stamp set.  Layer up a couple of the colours and add to a card base, or create your own.

Wednesday 1 August 2012

Class Sneek Peak 1


So here's the first sneek peek of one of the cards for the Year in Cards Class starting in September.  I love these colours, as it makes a great male card.

Sneek peek 2 will be coming up soon!

Wednesday 25 July 2012

A Year in Cards

Hello All,

Isn't it gorgeous weather? And about time I can hear you reply!

Well, just a quick post to flag up the new page on my blog for those people who are going to attend my 'A Year in Cards' course. It's on a little tab just under the Greetings from Guernsey banner at the top of the page, click on it to go to a new page.

I've added information on the things you'll need to bring with you each class, some essential and some optional. I know the experienced crafters among you will have a lot of the optional items and more, please feel free to bring them with you for each class.  If you’re a new crafter or new to card making, don't worry, bring the essentials and borrow the rest of the kit from me.  You may want to bring a notebook too.

I aim to cater for both brand new card makers as well as those with some experience, who would like to expand their knowledge.  You never know if lots of people sign up  (this class size will be around 12) I might be asked back I'd love to do a class for more advanced techniques or some scrapbooking or even off the page (3D projects).

I'll get some of the cards up on here as I start to design them to give you a sneek peek, we'll start simple and elegant, and progress to more complex cards and techniques.

Signed up already? Please leave me a comment below and introduce yourself.  Don't know how don't worry I'll be in contact before the class.

Want to sign up?  Go over to the WEA site and fill in the form.

Monday 23 July 2012

New Card Classes in Guernsey


Oh my goodness the WEA, an organisation who run courses and classes in many places around the world, have asked me to run a set of 8 classes from September in Guernsey, every third Wednesday evening of the month (except December).


So what are we going to do?  Well all sorts!  The course is called A Year in Cards and cover hatches, matches, despatches as well as birthdays, male themed cards, not forgetting Christmas.  It's aimed at beginners and intermediate card makers, we'll aim to make 30 cards using a variety of techniques and lots of flexibility to try new things.  I can't belive its only £66 for the course, that's £8.25 per 2 hour lesson, bargain.


Above is a sample of some previous cards I've made for various occassions.

To sign up for the class fill in the forms on the WEA website or take a look at the Craft leaflet.

I look forward to hearing from you with any questions and meeting you in September at Les Cotils!  If you've not met me yet I'll be the excited one...


Class Dates
19 September
17 October
21 November
16 January
20 February
20 March
17 April
15 May